Android 软件自动更新功能实现的方法
发布时间:2015-03-18 00:00 来源:投稿
该文文章小编为大家介绍,Android 软件自动更新功能实现的方法。需要的朋友参考下。
相信所有的用户都遇到过软件提醒更新的情况,下面就将实现此功能
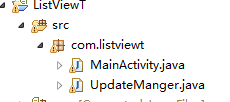
首先看一下程序目录结构
步骤:
1、新建一个类UpdateManger,用于显示提示更新
public class UpdateManger {
 // 应用程序Context
 private Context mContext;
 // 提示消息
 private String updateMsg = "有最新的软件包,请下载!";
 // 下载安装包的网络路径
 private String apkUrl = "http://softfile.3g.qq.com:8080/msoft/179/24659/43549/qq_hd_mini_1.4.apk";
 private Dialog noticeDialog;// 提示有软件更新的对话框
 private Dialog downloadDialog;// 下载对话框
 private static final String savePath = "/sdcard/updatedemo/";// 保存apk的文件夹
 private static final String saveFileName = savePath + "UpdateDemoRelease.apk";
 // 进度条与通知UI刷新的handler和msg常量
 private ProgressBar mProgress;
 private static final int DOWN_UPDATE = 1;
 private static final int DOWN_OVER = 2;
 private int progress;// 当前进度
 private Thread downLoadThread; // 下载线程
 private boolean interceptFlag = false;// 用户取消下载
 // 通知处理刷新界面的handler
 private Handler mHandler = new Handler() {
  @SuppressLint("HandlerLeak")
  @Override
  public void handleMessage(Message msg) {
   switch (msg.what) {
   case DOWN_UPDATE:
    mProgress.setProgress(progress);
    break;
   case DOWN_OVER:
    installApk();
    break;
   }
   super.handleMessage(msg);
  }
 };
 public UpdateManger(Context context) {
  this.mContext = context;
 }
 // 显示更新程序对话框,供主程序调用
 public void checkUpdateInfo() {
  showNoticeDialog();
 }
 private void showNoticeDialog() {
  android.app.AlertDialog.Builder builder = new android.app.AlertDialog.Builder(
    mContext);// Builder,可以通过此builder设置改变AleartDialog的默认的主题样式及属性相关信息
  builder.setTitle("软件版本更新");
  builder.setMessage(updateMsg);
  builder.setPositiveButton("下载", new OnClickListener() {
   @Override
   public void onClick(DialogInterface dialog, int which) {
    dialog.dismiss();// 当取消对话框后进行操作一定的代码?取消对话框
    showDownloadDialog();
   }
  });
  builder.setNegativeButton("以后再说", new OnClickListener() {
   @Override
   public void onClick(DialogInterface dialog, int which) {
    dialog.dismiss();
   }
  });
  noticeDialog = builder.create();
  noticeDialog.show();
 }
 protected void showDownloadDialog() {
  android.app.AlertDialog.Builder builder = new android.app.AlertDialog.Builder(mContext);
  builder.setTitle("软件版本更新");
  final LayoutInflater inflater = LayoutInflater.from(mContext);
  View v = inflater.inflate(R.layout.progress, null);
  mProgress = (ProgressBar) v.findViewById(R.id.progress);
  builder.setView(v);// 设置对话框的内容为一个View
  builder.setNegativeButton("取消", new OnClickListener() {
   @Override
   public void onClick(DialogInterface dialog, int which) {
    dialog.dismiss();
    interceptFlag = true;
   }
  });
  downloadDialog = builder.create();
  downloadDialog.show();
  downloadApk();
 }
 private void downloadApk() {
  downLoadThread = new Thread(mdownApkRunnable);
  downLoadThread.start();
 }
 protected void installApk() {
  File apkfile = new File(saveFileName);
  if (!apkfile.exists()) {
   return;
  }
  Intent i = new Intent(Intent.ACTION_VIEW);
  i.setDataAndType(Uri.parse("file://" + apkfile.toString()),
    "application/vnd.android.package-archive");// File.toString()会返回路径信息
  mContext.startActivity(i);
 }
 private Runnable mdownApkRunnable = new Runnable() {
  @Override
  public void run() {
   URL url;
   try {
    url = new URL(apkUrl);
    HttpURLConnection conn = (HttpURLConnection) url.openConnection();
    conn.connect();
    int length = conn.getContentLength();
    InputStream ins = conn.getInputStream();
    File file = new File(savePath);
    if (!file.exists()) {
     file.mkdir();
    }
    String apkFile = saveFileName;
    File ApkFile = new File(apkFile);
    FileOutputStream outStream = new FileOutputStream(ApkFile);
    int count = 0;
    byte buf[] = new byte[1024];
    do {
     int numread = ins.read(buf);
     count += numread;
     progress = (int) (((float) count / length) * 100);
     // 下载进度
     mHandler.sendEmptyMessage(DOWN_UPDATE);
     if (numread <= 0) {
      // 下载完成通知安装
      mHandler.sendEmptyMessage(DOWN_OVER);
      break;
     }
     outStream.write(buf, 0, numread);
    } while (!interceptFlag);// 点击取消停止下载
    outStream.close();
    ins.close();
   } catch (Exception e) {
    e.printStackTrace();
   }
  }
 };
}
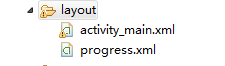
2、新建一个xml文件,用于定义下载过程中的ProgressBar的进度显示,名为progress.xml
< xml version="1.0" encoding="utf-8" >
<LinearLayout xmlns:android="http://schemas.android.com/apk/res/android"
android:layout_width="fill_parent"
android:layout_height="wrap_content" >
<ProgressBar
android:id="@+id/progress"
style=" android:attr/progressBarStyleHorizontal"
android:layout_width="fill_parent"
android:layout_height="wrap_content" />
</LinearLayout>
3、在MainActivity中onCreate()方法中,进行软件更新的检测
mUpdateManger = new UpdateManger(MainActivity.this);// 注意此处不能传入getApplicationContext();会报错,因为只有是一个Activity才可以添加窗体
mUpdateManger.checkUpdateInfo();
并且在配置清单文件中添加网络权限 <uses-permission android:name=”android.permission.INTERNET” />
4、运行程序

–点击下载–>